![]()
![]()
This is an entry to explain in quite some detail, but very objectively, how to configure a PFSense box to make Internet and IPTV available at home, without the use of the Experia box sent by KPN (Netherlands).
Normally when you hire the service from KPN, they will send a fiber endpoint, one set-top box that will work as IPTV mostly and an Experia Box, which is the equipment that will be responsible to hold the WAN port, connected to the fiber endpoint and provide LAN ports for the set-top box, desktop/laptop computer and also provides Wireless Internet.
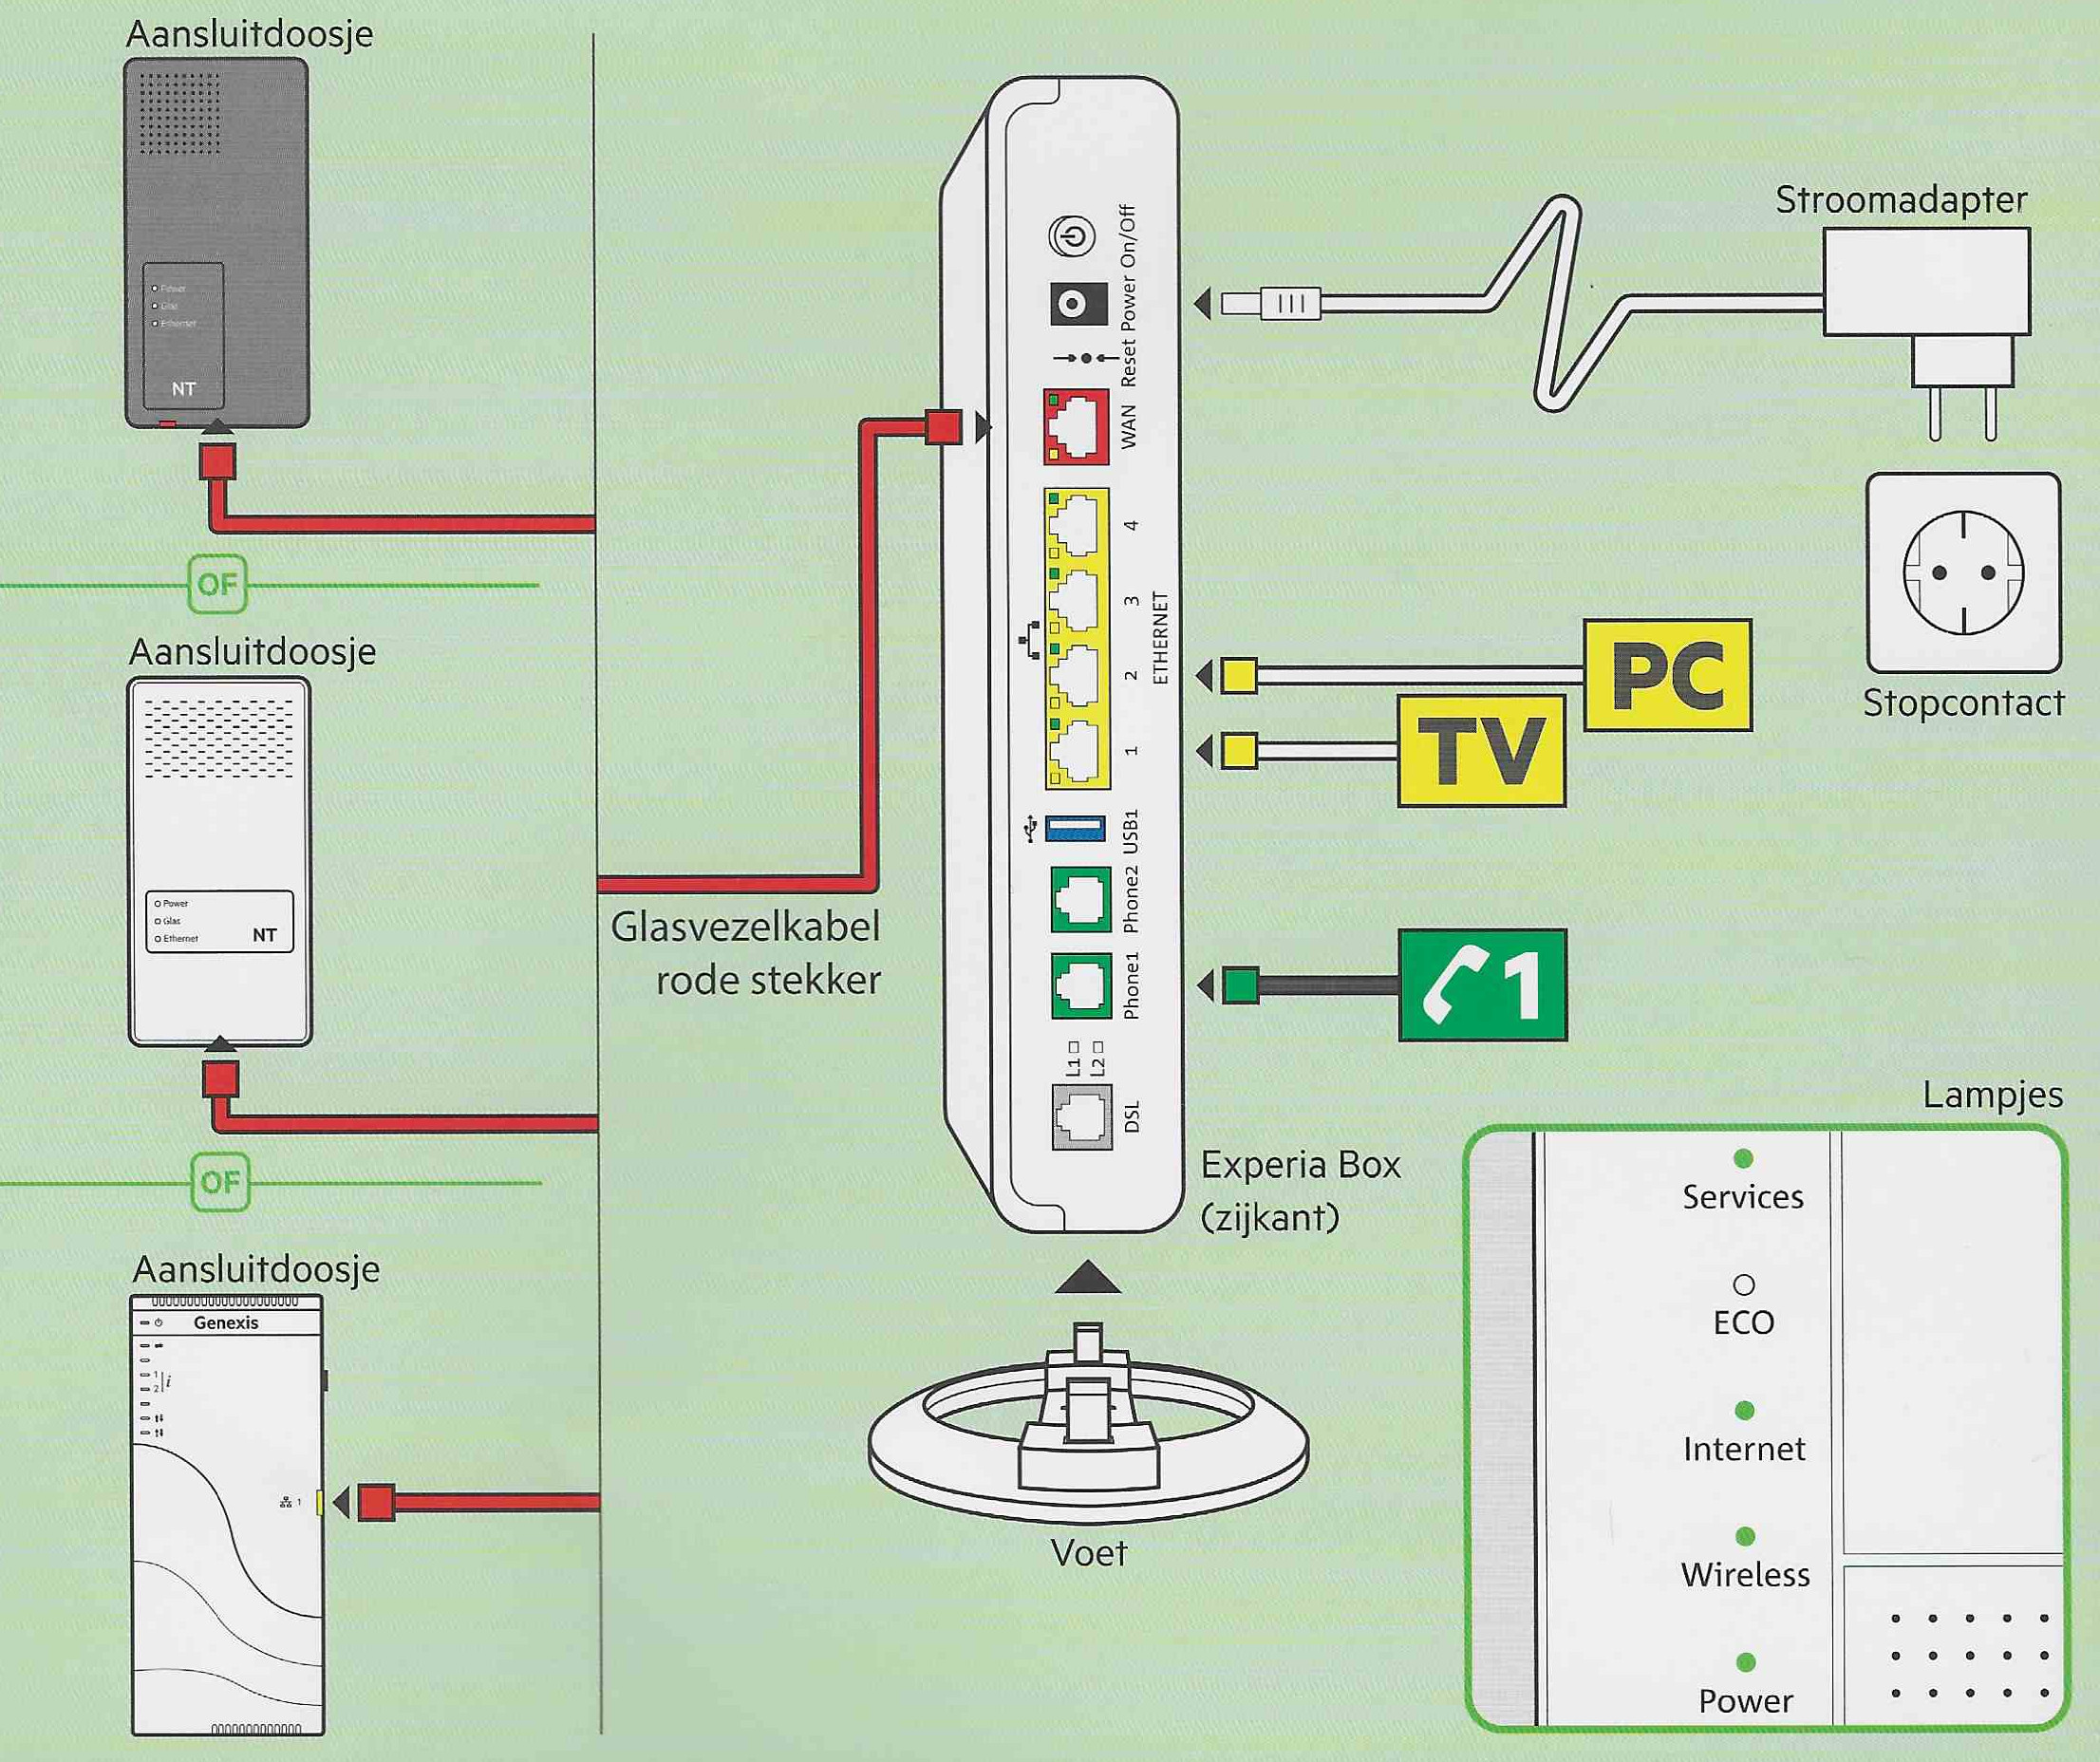
Well, if you are a bit security savvy, DYIer and have decidedly live on the OpenSource side of the lifestyles spectrum, you may be happy to know that using an old computer and PFSense and can reproduce the functionalities of the KPN's Experia box almost enirely, at least, sufficiently yo have the IPTV and the Internet working as you wish, with the same speed and proper TV functionality like the nice IPTV buffering (recording, going back programming and so on...)
It is important to notice beforehand that this setup will not cover how to make telephony work nor will cover wireless substitution, that's up to you.
Knowingly, when not using this format of setup, telephony is quite complicated to make work and for me it makes no difference if I have a "landline" or not. If it does make a lot of difference for you, it should be wise to research that particular bit first.
I shall make reference to the original article I found that also explaing for the great part this same setup, if will work almost out-of-the-article as well, but there are some differences due to versioning of pfsense and also due to some problems what may appear on the way, which here I will already lay down directly with the solution what worked for me.
The original article I read (in Dutch) is:
Assuming you have a working computer with two interfaces (network cards), and that you already have installed, and have PFSense working on this machine, we shall start first configuring the necessary VLANs.
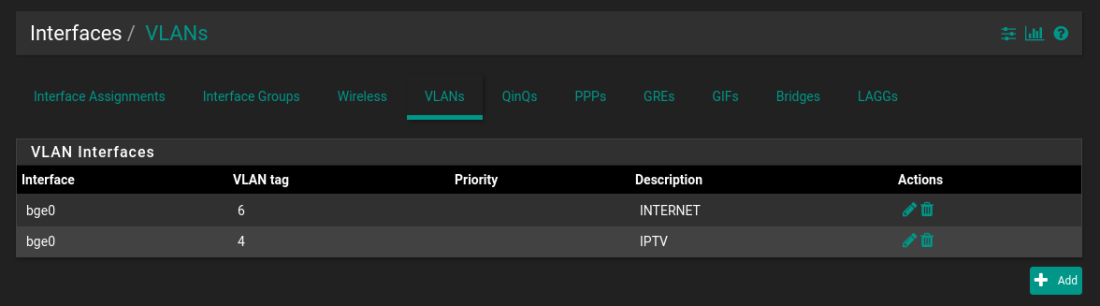
VLANs
Go to:: Interfaces >> Assignments >> VLANs
Here you will configure at least two VLANs:
- VLAN 6 will be used for Internet traffic
- VLAN 4 will be used to IPTV traffic
As said before, we will not conver telephony, but if you going to try, you will also need VLAN 7 configured here (or somewhere else).
It should look like:
(click to enlarge)
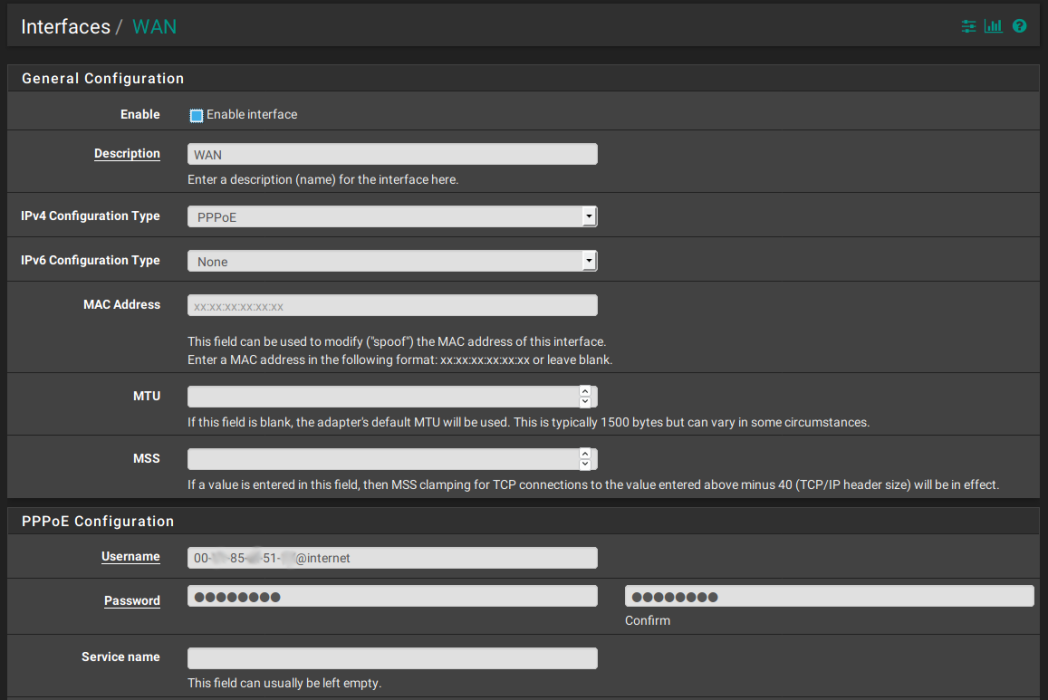
WAN Interface + PPPoE
You probably had to add the interface already during the procedure of installation, if not:
Go to:: Interfaces >> Assignments
And select the interface that will be your WAN. It shoulw be some interface name like "em0" or "bge0" followed by the VLAN6 you have configured earlier, as such "bge0_vlan6".
Then continue to:
Go to:: Interfaces >> WAN
There you must setup the PPPoE for acquiring the external address for your network.
PPPoE will require a user that should look like: "00-11-22-aa-bb-cc@internet" where "00-11-22-aa-bb-cc" the macaddress from your network card. That can be found, following the name of your WAN interface, but instead of ":" you will use with "-".
The password could be "welkom", but in fact I just need to anything into the field in order to save the page, it doesn't look like the password is really necessary, anything goes!
It should look like:
(click to enlarge)
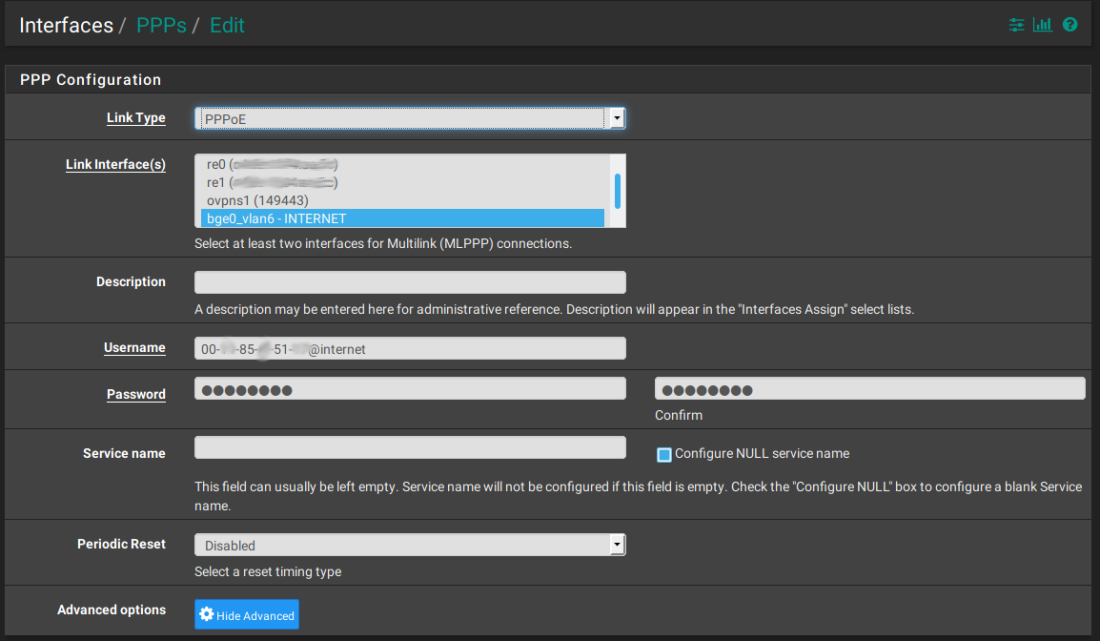
Thereafter it is always a good idea to go on the PPPs options and check if everything is set correctly, as such:
Go to:: Interfaces >> Assignments >> PPPs
(click to enlarge)

Then, ask to edit the only item you might have:
(click to enlarge)
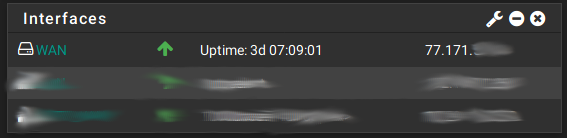
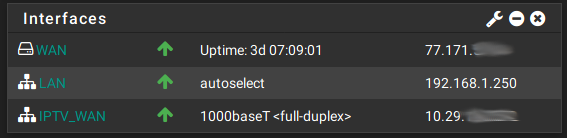
If everything goes accordingly, on the moment you have saved the changes, the interface should have successfuly fetched a new external IP address from KPN provider.
At the dashboard you might have a "Interfaces" box that should show your new external IP address:
(click to enlarge)
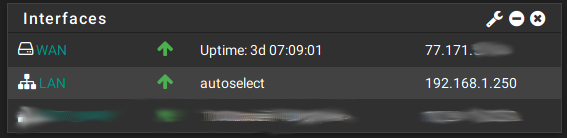
LAN Interface
I hope by now that your LAN interface is already configured and looking good:
(click to enlarge)
Lets then setup the last necessary interface.
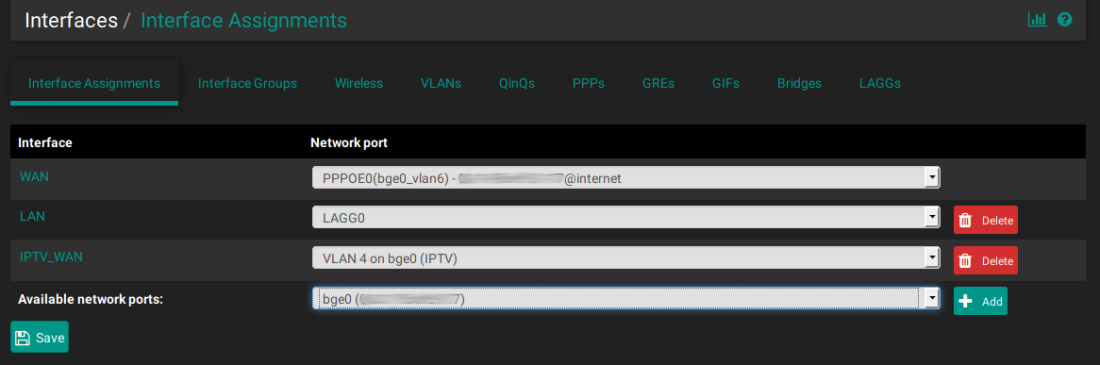
IPTV Interface
With the VLAN 4 added earlier you should have an interface available for configuration which is the combination of the VLAN4 and your external interface (the one connected into the fiber endpoint).
Go to:: Interfaces >> Assignments
(click to enlarge)
Basic Config
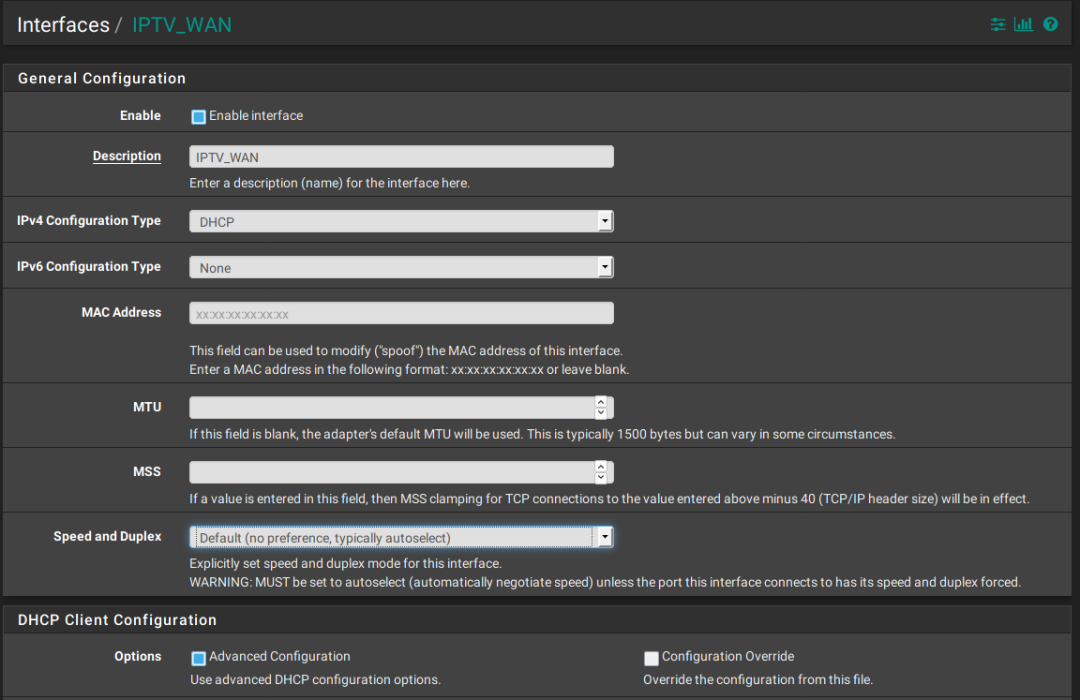
Advanced DHCP Configuration
With that, you might already see the IPTV interface able to collect the IP Addr from KPN.
Going on your dashboard you may find:
(click to enlarge)
LAN DHCP
I think it makes more sense to use the DHCP from PFSense itself to attend your LAN.
Doing this you could also add them on your local DNS and reverse DNS (if you have any) and have a better control over the devices.
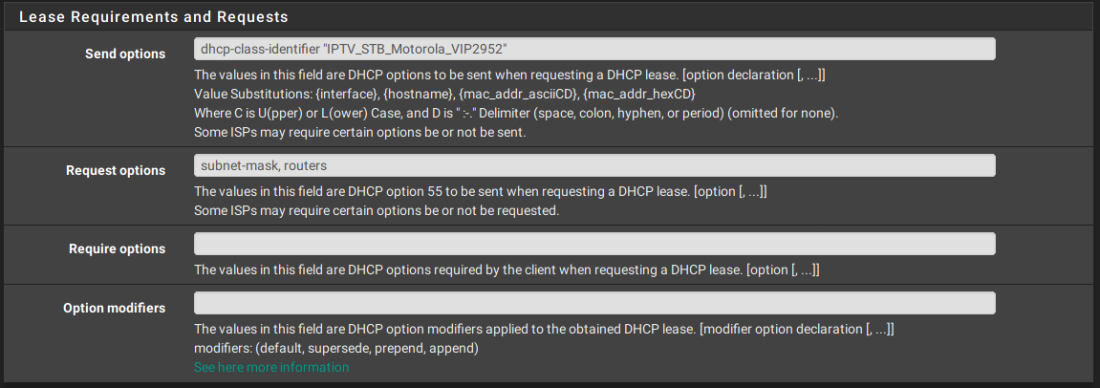
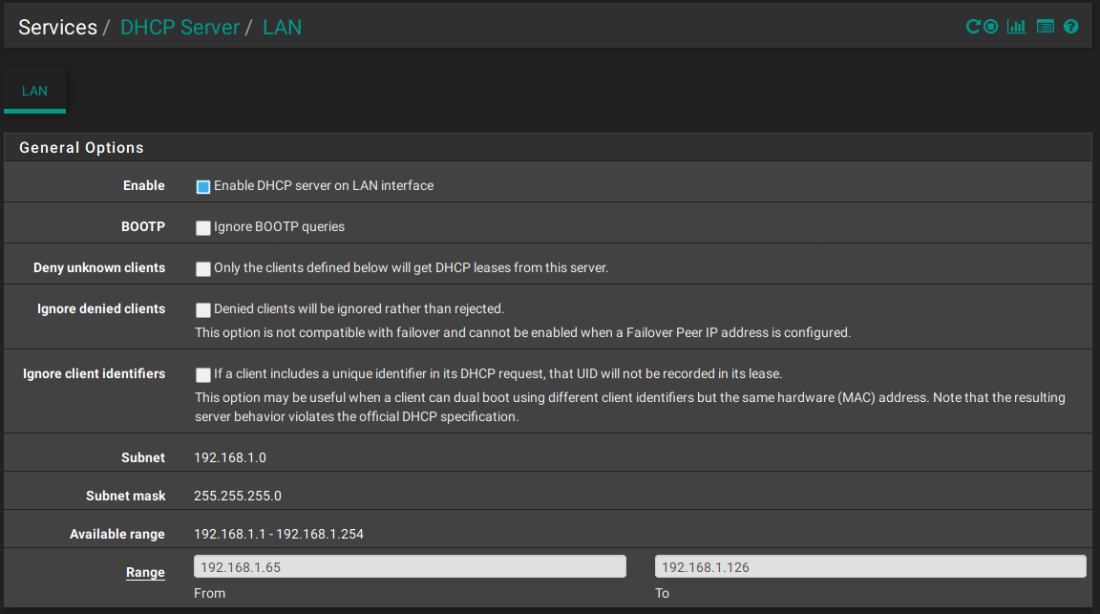
Disregard the DHCP system you might be using, I will describe what you need to add, in order to make you IPTV set-top box satisfied to get an IP address.
Go to:: Services >> DHCP Server >> LAN
(click to enlarge)
And on the same page, under "Additional BOOTP/DHCP Options":
(click to enlarge)
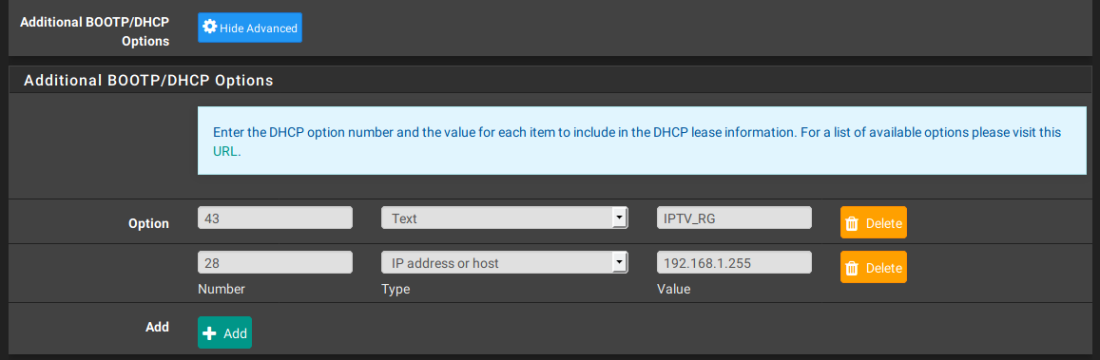
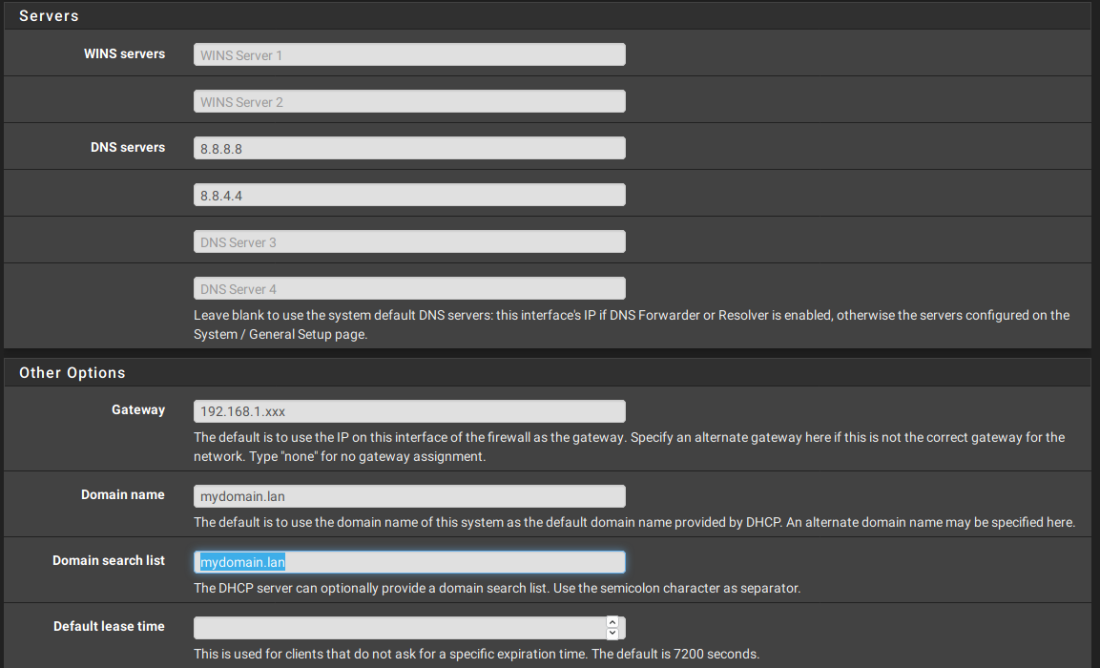
Obvisouly you would need to adjust the addressess to the network you have set up. As my network is 192.168.1.0/24 (255.255.255.0), you might need to adjust the addresses accordingly to your situation.
IGMP Proxy
Ok, that's the uncommon part of the configuration, because until here, most of these items of configuration are regular and they are possible to configure easily in many systems. Now, the IGMP Proxy is something else.
The IPTV works via multicasting. Because of the position of the set-top box on the network, you need to allow PFSense to forward the multicast from the KPN network, via VLAN 4, towards the set-top box under another interface (LAN). As such, IGMP Proxy will allow the set-top box request and receive IPTV traffic.
It is shameful but known thatPFSense have a buggy IGMP proxy software, unfortunately they are taking a huge time to fix it and there are parallel version on the Internet.
I used the one posted on the PFSense support page about this topic: PFSense Forum
You can go there and read it all and get into the messy discussion until the solution, or you can simply download the working, patched version here and get a go: igmproxy_all.zip
The idea is to upload the binary to your PFSense and substitute the /usr/local/sbin/igmpproxy binary by the downloaded version.
Go to:: Services >> IGMP Proxy
(click to enlarge)
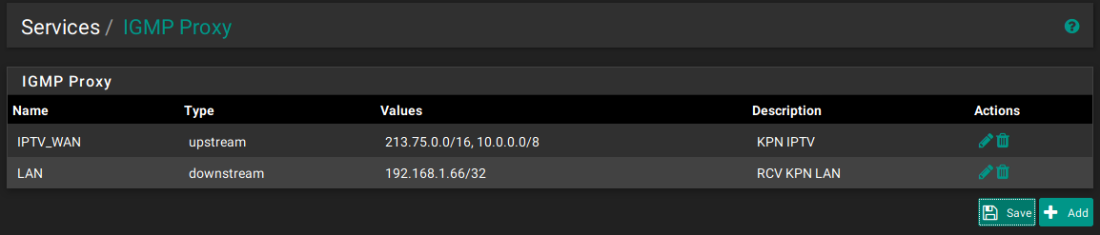
Notice that, I already isolated the IPTV set-top box IP address as "downstream", pointing to 192.168.1.66/32.
For "upstream" I added: 213.75.0.0/16, 10.0.0.0/8.
This is more or less "guessed", based on the traffic that was captured from the IPTV and the VLAN 4 interface. For me that was already sufficient and I have all the options for KPN Digital TV.
It it also important to notice that, your switches, manageable or not, must be "IGMP Snooping" aware otherwise all the devices on the network will receive multicast traffic, possibly slowing down the network a lot when you watching TV. You can see how that work around google, i.e.: IGMP / IPTV - Small Explanation
Routing IPTV Network
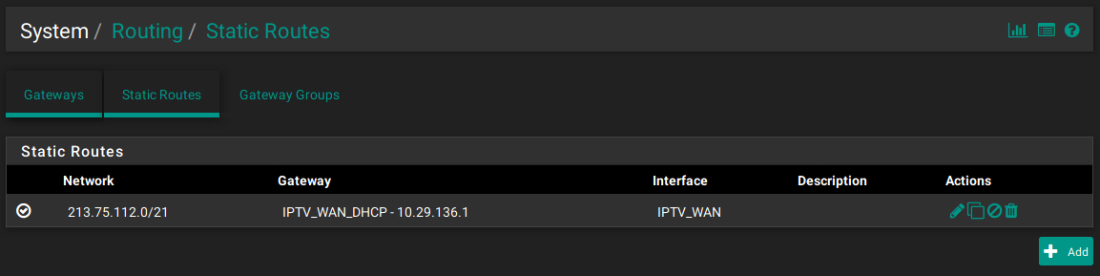
The very last step to make IPTV work, is to add on the PFSense routing table.
IGMP Proxy will create an internal routing table, but that will not be visible to the set-top box, which in turn, after first contact will try to connect to hosts inside KPN network, for me here, what worked correctly was the following:
Go to:: System >> Routing >> Static Routing
(click to enlarge)
Finishing Up
Just go there, turn on your IPTV set-top box and watch your preferred programs! Or let your kid test for you on his/her favorite channels :D

0 Comments: